SharePoint Integration Setup Illustrated Guide
Update: Please note that with the enhancements made to the Dashboard, there’s an easier way to set up Auto-Saving rather than in the BaseInfo Tab. See File Auto-Saving in the Admin Guide for SDA Dashboard.
CorsPro’s SalesDoc Architect (SDA) integrates with SharePoint, Microsoft’s collaboration and document management platform, to automate the saving and storage of SDA quote and output files.
There are 3 main steps to be completed by the SharePoint administrator to set up SharePoint integration with SDA:
- Set up a site collection
- Set up metadata columns
- Set up a “CorsPro” site template to use as the basis for creating new SDA-related subsites
1. Set up a Site Collection
It is suggested to name the site collection as “Opportunities YYYY”, with “YYYY” representing the current year. To set up a site collection follow the steps below
- Go to Office 365 via the web
- Select Admin
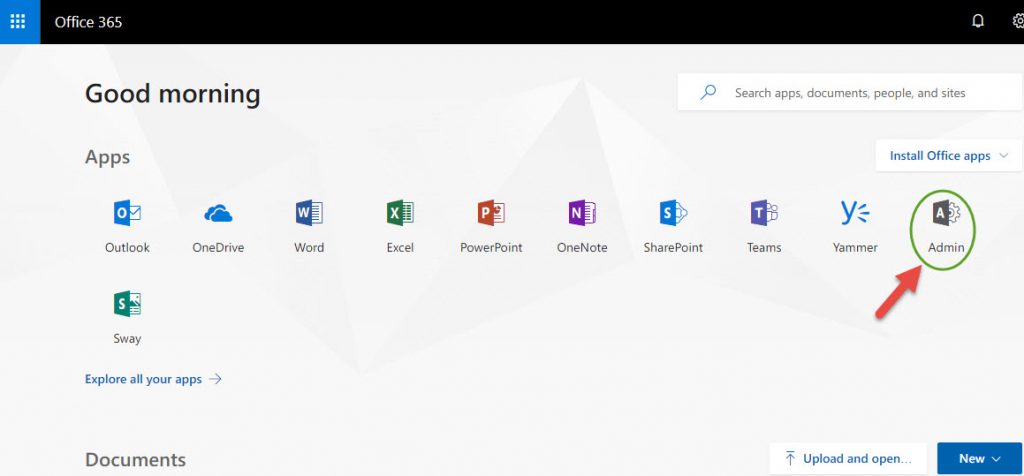
- Select Admin Centers
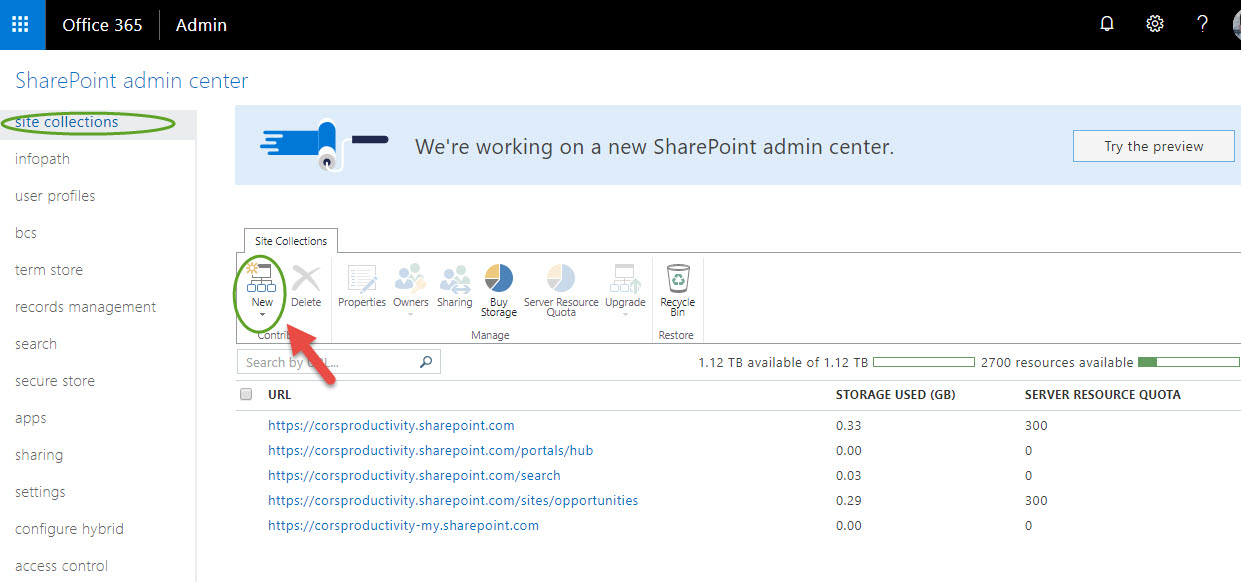
- Select SharePoint

- Select Site Collections
- Select New
- Select Private Site Collection
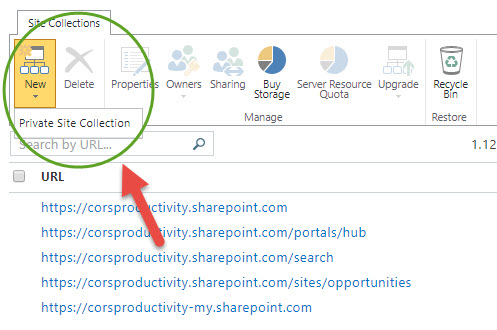
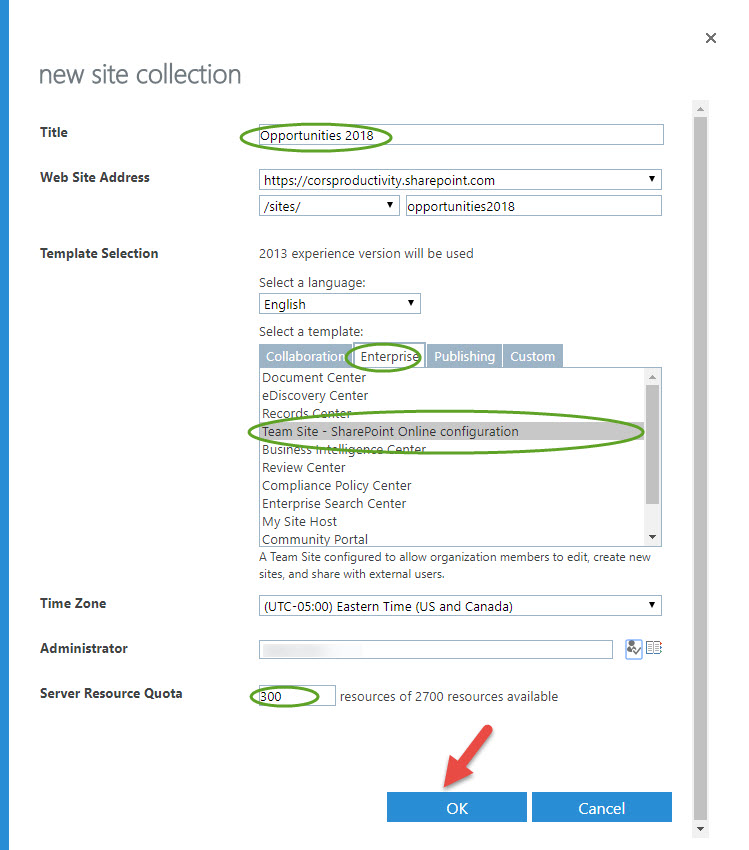
In the “new site collection” dialog (below), enter “Opportunities YYYY” as the Title and “opportunitiesYYYY” into the third “Web Site Address” box, with “YYYY” representing the current year
- Select the Language
- Select the Enterprise tab, then “Team Site – SharePoint Online configuration”
- Enter the name of your company’s SharePoint administrator and select your time zone.
- Leave the Server Resource Quota at the default (note: SharePoint no longer uses this value)
- Click OK button
** After clicking OK, the site creation may take several minutes**.
When the Collection is created “NEW” will be added as in the following example:
![]()
2. Set up Metadata Columns
Add one or more metadata columns to facilitate searches and filtering
- Go to the new site collection by typing the following URL into your browser’s URL bar https://[YourCompanyDomainOnOffice365].sharepoint.com/sites/opportunitiesYYYY
- Go to the Gear on Settings Menu
- Select Site Settings
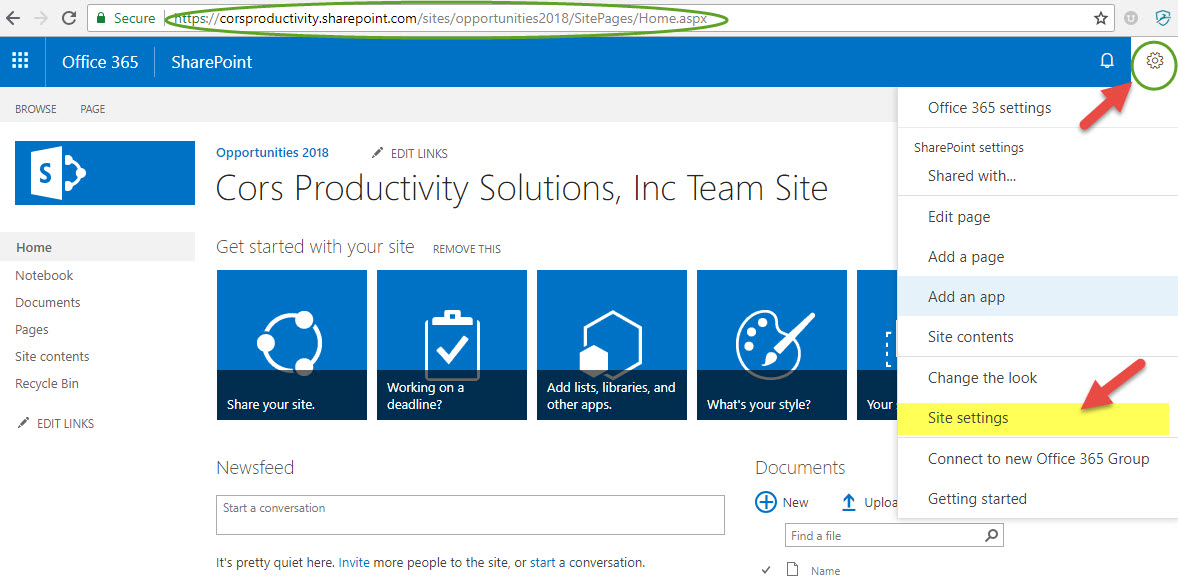
- In the Web Design Galleries section, click “Site Columns”
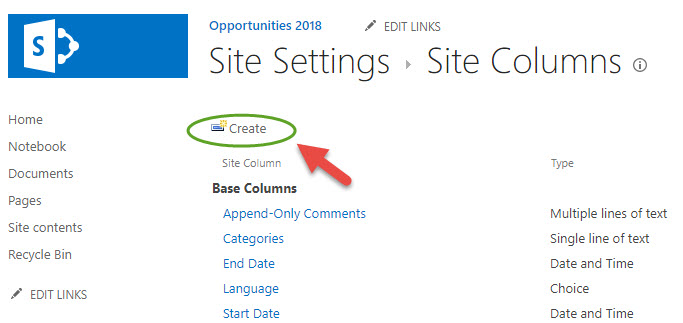
- Select Create
- In the “Create Column” screen, enter “DocumentType” as the Column Name
- Select the “Choice (menu to choose from)” radio button

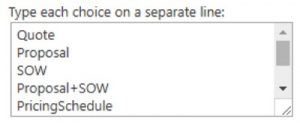
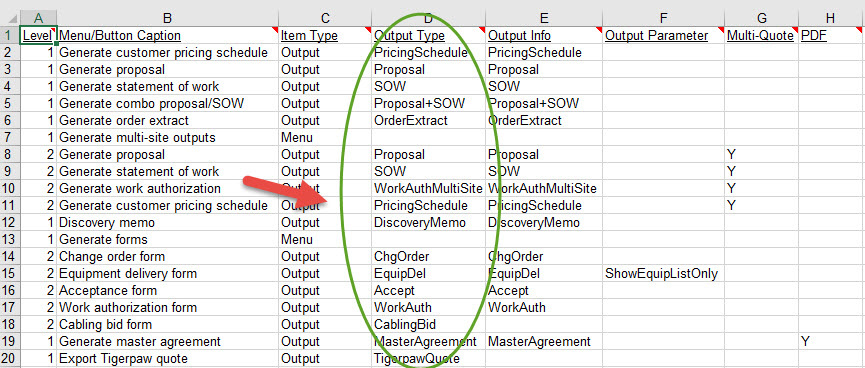
- Enter “CorsPro” as a new group under which the new metadata columns are grouped. Add as choices “Quote” plus any Output Types in column D of outputs.xls (from the c:\CorsPro\PQuote\Data folder, see graphic below), for outputs to auto-save. Also add any non-SDA DocumentType choices (e.g., Diagram, Import File)
- Click the OK button

Column D from outputs.xls (from the c:\CorsPro\PQuote\Data folder)
Also add the following metadata columns, making sure to select “CorsPro” as the “Existing Group” under which these columns should be grouped:
- CustomerName (Single Line Text)
- OpportunityName (Single Line Text)
- SiteDescription (Single Line Text)
- QuoteID (Single Line Text)
- QuoteFileName (Single Line Text)
- OpportunityID (Single Line Text)
Do NOT set up the following within the site collection:
- Check-in/check-out (we will override that feature)
- Metadata columns that require data (we will upload null to these columns)
When finished, the following metadata columns listed in the “CorsPro” grouping will be shown:

3. Set up a CorsPro Site Template
Set up a site template called “CorsPro” (based on the site collection) to use as the template for new SDA-related SharePoint sites. This “CorsPro” template is REQUIRED for SDA to auto-create SharePoint sites.
- From the “Site Actions” section of Site Settings, click “Save site as template”
- Enter “CorsPro” as both the File name and the Template name
- Click OK
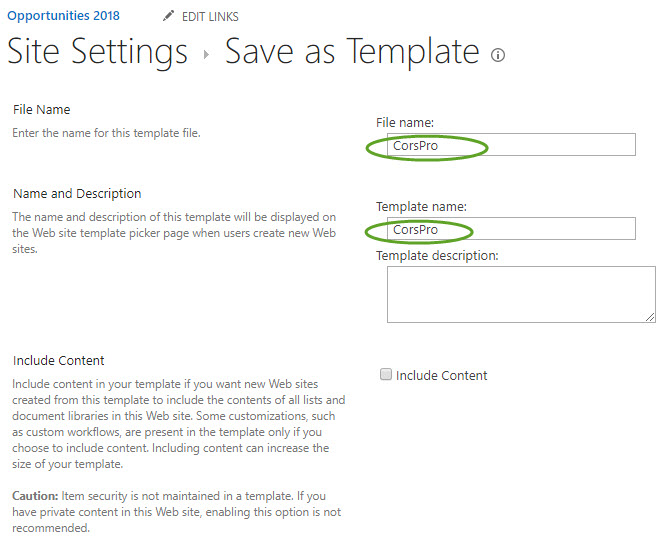
To modify the CorsPro template, as to add other metadata column:
- Go to Site Settings
- Click on “Solutions” with the “Web Designer Galleries” section
- Click on the drop-down next to the CorsPro template to first “Deactivate” the site

- After Deactivate, the option to Delete site template is shown

- Then save a new version of the “CorsPro” site template from the Site Settings page.
When complete your Site will look like the page below:

Set up the Base Info tab for SharePoint
Add “FilePlatform” named range
“SharePoint” should be the value to drive saving to SharePoint
- To be able to switch between saving to the network and SharePoint, consider making it a drop-down with “Network” and “SharePoint” as values
For SDA to auto-create SharePoint sites (by OpportunityID):
When a new opportunity is set up in SDA, a SharePoint site can be auto-created for the opportunity. The URL of the new site will be the value in a SharePointSiteCollectionURL named range on the Base Info tab plus the new opportunity ID, and the title of the site will be named based on the value in a SharePointSiteTitle named range on the Base Info tab.
- Add “SharePointSiteCollectionURL” named range
- Add “SharePointSiteTitle” named range, plus a formula to auto-calculate the title, include some combination of the following named ranges:
CustomerName
CRMOppName (which is stored on a hidden tab within SDA quote files)
Also insert “&OpportunityID&” as a variable within the formula, which will be auto-replaced with the actual opportunity ID when the SharePoint site is set up. It is recommended to add this to SharePointSiteTitle as this is a great way to search for the subsite using SharePoint’s subsite search function.
Example: =”&OpportunityID&”&” – “&CustomerName&” (“&CRMOppName&”)” which might end up looking something like
“100185 – Acme (IP Office)”
- Provide CorsPro with login credentials for a user with permission to create SharePoint sites. You might want to set up a “CorsPro” user for that. Make sure to provide admin access to this “user” for all site collections under which subsites will be auto-created (e.g., such as when you create new site collections for subsequent years).
To auto-save to existing SharePoint sites (not needed if sites are auto-created):
- Add “SharePointSiteURL” named range
- Make sure to include “Shared Documents” at the end of the URL
Auto-save requirements for the Base Info tab
- FileSaveName named range must exist
- LocalSaveFolder named range must exist and be set to save to local c:\ drive, ideally My Documents (note: if you add the MyDocumentsPath named range to the Base Info tab – perhaps in the hidden section – and unprotect that cell, SDA will auto-calculate the user’s My Documents path)
- For auto-saving OUTPUTS, set up OutputFileSaveName and OutputLocalSaveFolder (set to save to the local c:\ drive) as named ranges
For further details on setting up auto-saving for quotes and outputs, see the “Auto-Saving Files” topic within the Architect Manager User Guide