Add Content to the Outline
You can add content from:
- A Word, PDF or image file – this can be any file you already have or a new one you just created. Make sure the file is first saved to a shared location so that users will have access in a live SDA Quote. If the file is not in a shared location (e.g. SharePoint, Cloud-Stored SDA Files, or a network location), then users will not have access to the file when they generate the output.
- The Builder Library (if you have RFP Response Builder)
- The SalesDoc Architect Library
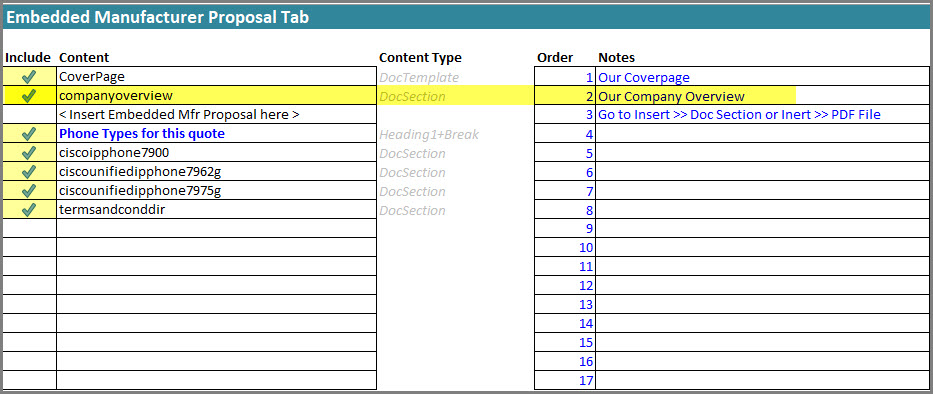
Example: In the example below we have added our Company Overview. Note that SDA adds the “DocSection” as the Content Type.

Figure 3: Example – DocSection
Insert a Doc Section
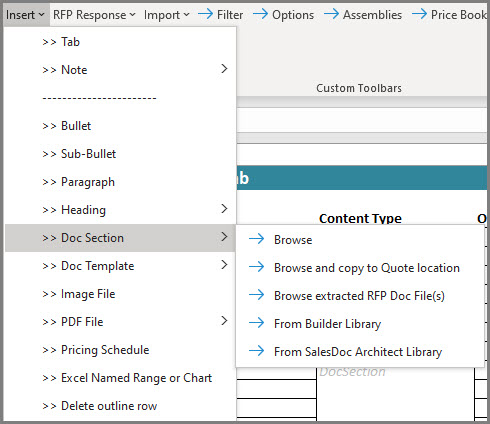
- On the RAW Tab, go to Add-ins >> Insert >> Doc Section
- Choose the source for the Doc Section you want to enter into your Outline
- Browse: This allows you to browse for your Doc Section. Make sure the file is first saved to a shared location (e.g. network drive, SharePoint, AWS, etc.) so that users will have access in a live SDA Quote.
- Browse and copy to Quote location: This function is for live quotes only and not for working in RAW tabs. This allows users to browse for the Doc Section and also auto-saves the document to the quote file’s saved location. Since you are setting up a Tab as an Admin and you are not saving the Quote File to a customer name in shared location, this option will not work in a RAW tab.
- Browse extracted Doc Section (if you have RFP Response Builder). This function is also for live quotes only and not for working in RAW tabs.
- From Builder Library (if you have RFP Response Builder)
- From SalesDoc Architect Library (see figure 5):
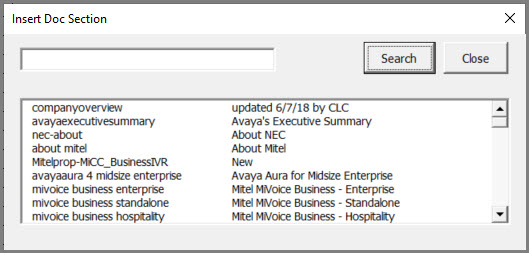
- The Insert Doc Section window will open
- Type in a keyword and click the Search button or click the Search button to show all available Doc Sections (internal only)
- Double-click the Doc Section to add it to your Outline.

Figure 4: Insert >> Doc Section
Tip! You can do this as many times as you want. In fact, you may want to include lots of different Doc Sections and have your users turn each section on/off as needed.

Figure 5: Insert Doc Section from SDA Library
Insert a PDF
You can add PDFs to your outline. A good use for this is if you want to add product.
- In the RAW Tab, click on the row where you want to insert the content
- Go to Add-ins >> Insert >> PDF File
- Choose either:
- Browse: browse for the PDF you want to add. Make sure the file is first saved to shared location so that users will have access in a live SDA Quote
- Browse and copy to Quote location: this function is for live quotes only and not for working in RAW tabs. Since you are setting up a Tab as an Admin and you are not saving the Quote File to a shared location, this option will not work in a RAW tab.
- Select the PDF file and it will be added to your Outline.
Add a Bullet, Sub-Bullet, Paragraph or Heading to the Outline
You can add bullets, sub-bullets, paragraphs and headings to your Outline. These items will be inserted into the output Word document using the style of the Doc template.
- In the RAW Tab, click on the row where you want to insert the bullet, sub-bullet, paragraph or heading
- Go to Add-ins >> Insert
- Choose either:
- Bullet
- Sub-Bullet
- Paragraph
- Heading: choose the type of heading you’d like to insert.
- Enter the text you want displayed as the bullet, sub-bullet, paragraph or heading in the Content column.
Note: You may need to play around with the different Heading options to see which one works best for your output.
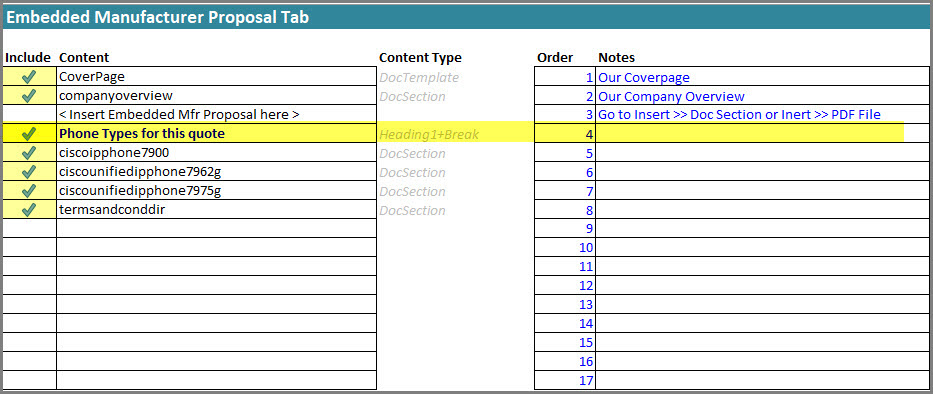
Example: In the example below we inserted a Heading 1 with a page break; this means that a page break will be inserted before the Heading. We entered “Phone Types for this quote” as the text for the Header 1.

Figure 6: Example – Heading
Delete a Row
You can delete a row from your outline. This is helpful when you have inserted content into the outline that you’d like to delete.
- In the Tab, click on the row that you want to delete from the Outline
- Go to Add-ins >> Insert >> Delete Outline Row
Note: This action cannot be undone.
Next:
- go to next section – Insert the Third-Party Proposal into Outline