Inserting a Doc Section
- Click on the cell under the Content column where you want to insert your content.
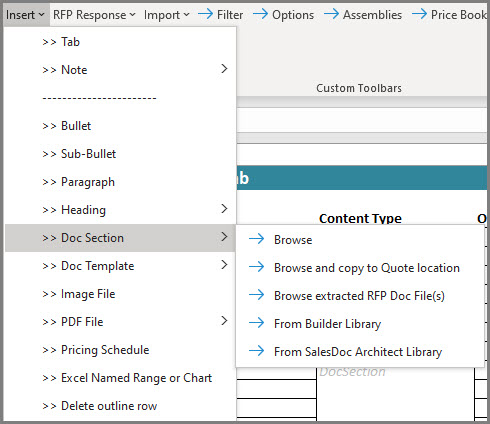
- Go to Add-ins >> Insert >> Doc Section
-
- Browse: This allows you to browse for your Doc Section.*
- Browse and copy to Quote location: This allows you to browse for the Doc Section and also auto-saves the document to the quote file’s save location.*
- Browse extracted Doc Section (if you have RFP Response Builder).
- From Builder Library (if you have RFP Response Builder)
- From SalesDoc Architect Library: This allows you to choose document from the SDA Library
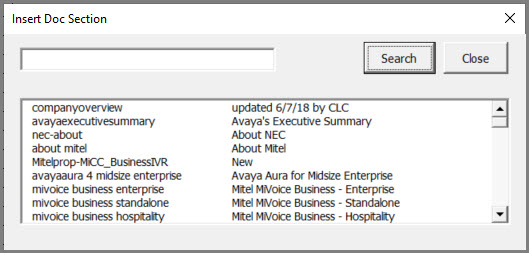
- The Insert Doc Section window will open
- Type in a keyword and click the Search button or click the Search button to show all available Doc Sections (internal only)
- Double-click the Doc Section to add it to your Outline

Figure 1: Insert Doc Section
Note:
If your organization uses SDA Auto-Saving (in which Quotes and associated docs are automatically saved to a shared file location) then you need to make sure that the file you are inserting into your Outline is moved or copied to the shared location. If the file is not in a shared location (e.g. SharePoint, SDA Hosted Services through AWS, or a network location), then other users will not have access to the file when they generate the output.

Figure 2: Inserting Doc Section from SDA Library